This page is your go-to guide for getting started with using ClickUp. I hope this gets you on the right path to setting up your ClickUp account, so you can learn and manage your projects!
Disclosure: I am a participant in the ClickUp Affiliate Program, and I may earn a commission if you click on my referral link and make a purchase. This supports me at no additional cost to you, so I can keep creating high quality content just like this, to help you advance your career and earn the income you deserve! Thank you for your support!
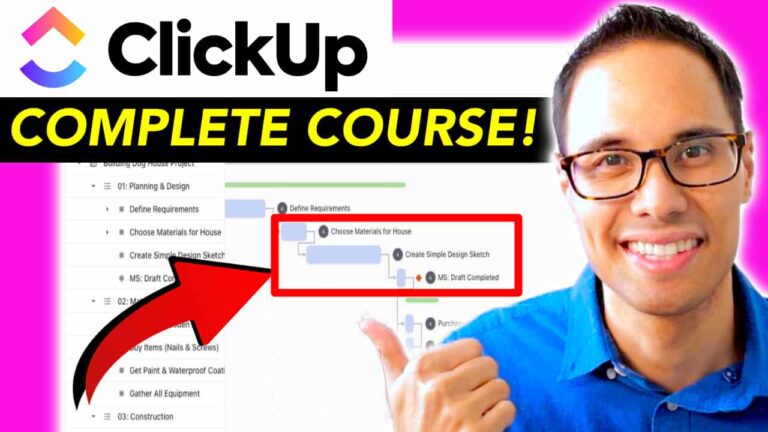
Step #1: Create a FREE Account with ClickUp
ClickUp is one of the most common software tools used to manage projects for personal use and business teams across many industries,, because you can setup Kanban Boards, setup your Backlog, create project documentation, and track everything all in one software.
Click here to set up your own FREE account with ClickUp, so you have admin access and your own privileges to play around with and create projects. At the time of this writing, using ClickUp is free (no credit card is needed), so you can get started with managing your projects.
Many companies use ClickUp to lead & manage their projects, as well as to increase their productivity. A few examples include: Logitech, Sephora, Chick-fil-A, Zillow, Siemens, AT&T, and American Airlines.
I encourage you to setup your own ClickUp account byclicking here. Start testing things out, and begin playing around with ClickUp, so you’ll know the basics of setting up projects, creating a Kanban Board, and setting up your project with an entire Backlog of work items inside of ClickUp.
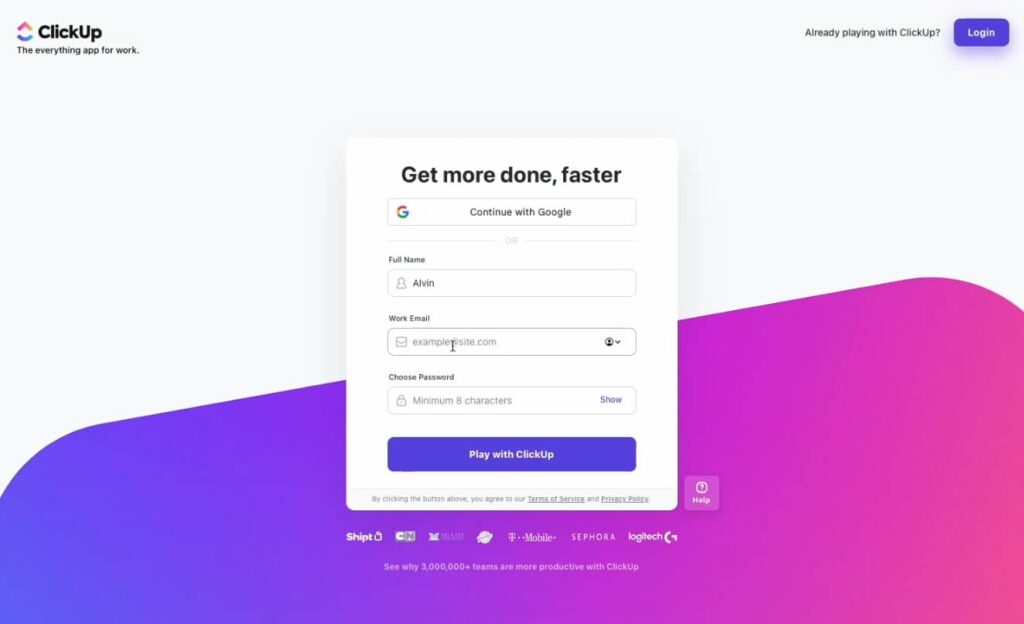
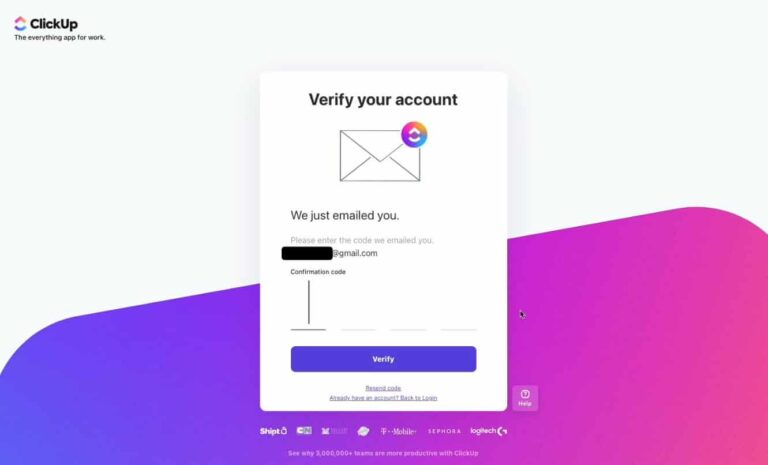
To create an account with ClickUp, you’ll need to input your e-mail address, and afterwards, ClickUp will send you an email with a Verification Code to verify it. Then, you will need to create your own password for your ClickUp account.
Just keep in mind that the email and password combination you use, will be what’s used to log-in to your ClickUp account. So, make sure you write this down and don’t forget it!
As a friendly disclaimer, the name you use is what you will see throughout your ClickUp Space.
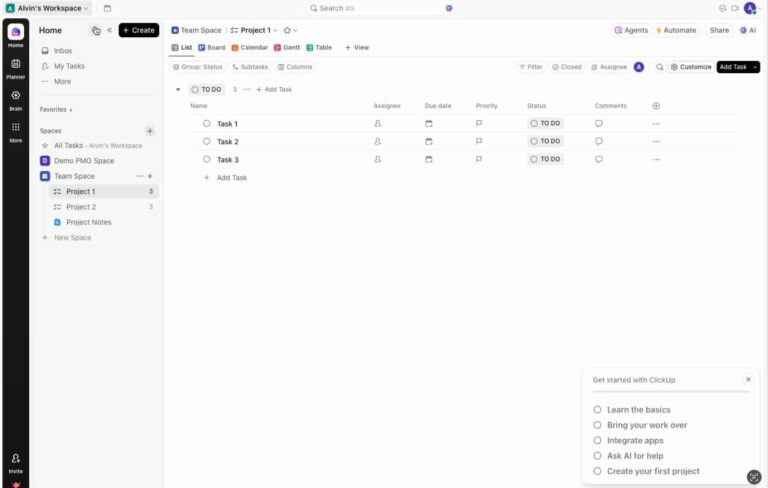
Step #3: Navigate the ClickUp Homepage
After you create your account, you’ll answer several questions to setup your account, and you’ll be presented with a few tutorial videos to get started.
Once you’re inside your ClickUp account, this is the Home Page that you will see.
A few important things:
Left Panel: This will be your Go-To for navigating your entire ClickUp Space. So, everything from your Company Workspace, Project Folders, Task Lists. and Project Documentations
Right Side: This is where you will see everything that you click on. So, you’ll see the details in your Spaces, Folders, and Lists here.
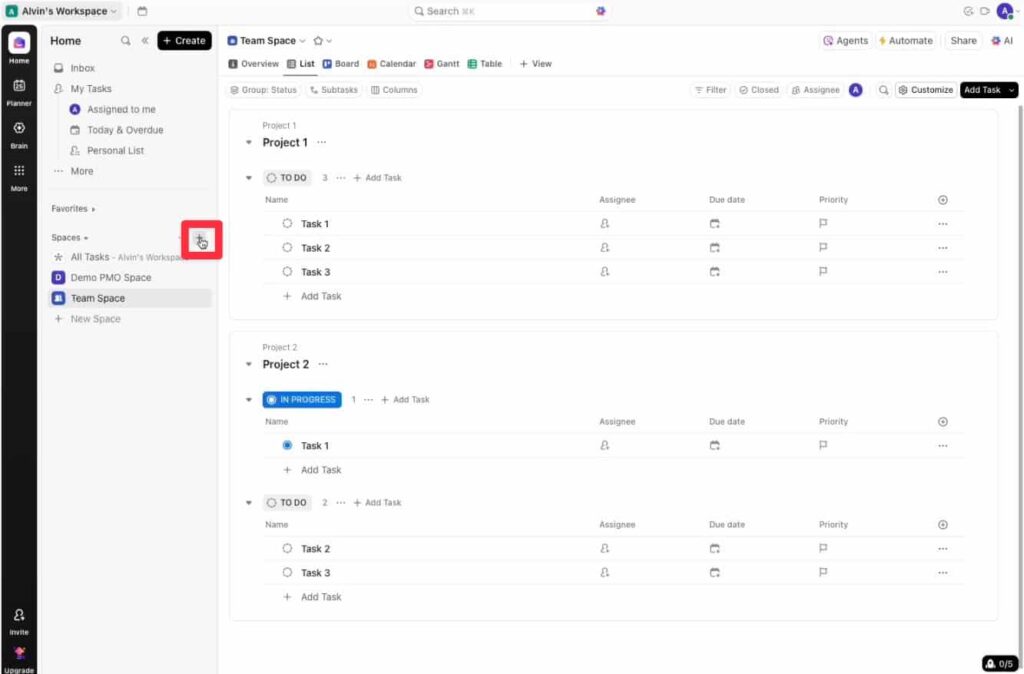
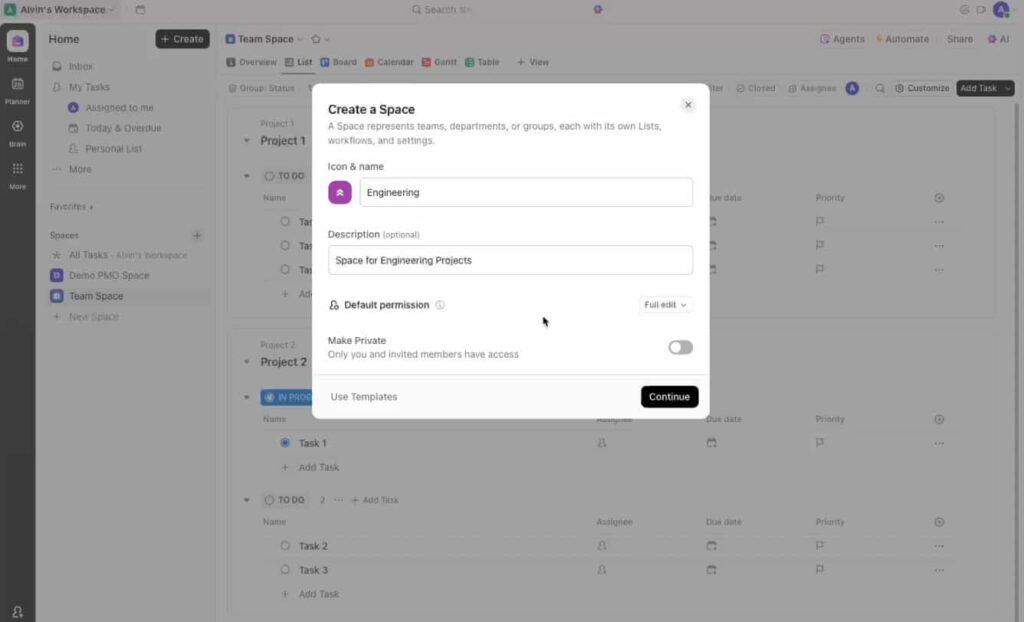
Step #4: Create Your First Space
Now that you’re inside ClickUp, first create your Space, by clicking on the + Symbol that’s next to “Spaces”, as I’ve highlighted below.
In my example below, you could name your Space: “Engineering”. As best practice, your Space should correspond to your Team or Department that’s inside your company. For example, Marketing, HR,, R&D, Engineering, or Operations.
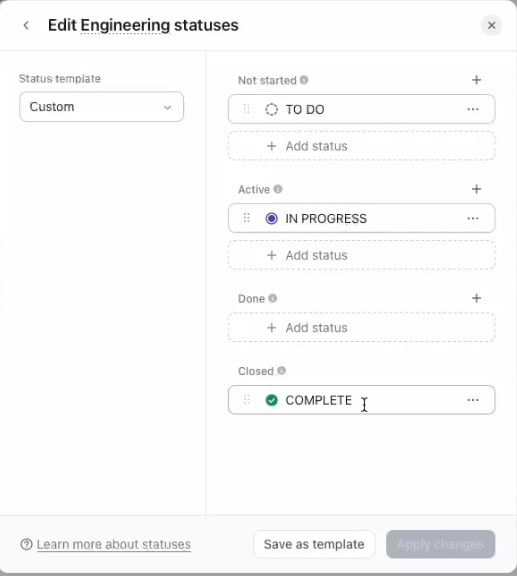
As you setup your Workspace, you also have the opportunity to define the Workflow for each of your Statuses. For my example, I’m leaving the Statuses to be: To-Do, In Progress, and Completed. Feel free to tailor this to best fit what you need for your projects and your company.
This website uses cookies to improve your experience while you navigate through the website. Out of these, the cookies that are categorized as necessary are stored on your browser as they are essential for the working of basic functionalities of the website. We also use third-party cookies that help us analyze and understand how you use this website. These cookies will be stored in your browser only with your consent. You also have the option to opt-out of these cookies. But opting out of some of these cookies may affect your browsing experience.
Necessary cookies are absolutely essential for the website to function properly. This category only includes cookies that ensures basic functionalities and security features of the website. These cookies do not store any personal information.
Any cookies that may not be particularly necessary for the website to function and is used specifically to collect user personal data via analytics, ads, other embedded contents are termed as non-necessary cookies. It is mandatory to procure user consent prior to running these cookies on your website.